
Get started with Foreign Trade Management in Odoo/ERPOnline
Key Features at a glance
These are highlighted features of the Foreign Trade module, including:
Flexible logistics route for importing/exporting goods
Stop the picking/delivery at the Custom Zone for custom declaration
Automatically calculate taxes during custom declaration
Integrated with Accounting for importing/exporting taxes automatic encoding into the accounting system
Pay importing/exporting taxes
Module Installation
Step 1: Access "Apps" >> Find “Foreign Trade” in “Apps” >> Click the “Install” button to start installing the app


Configuration
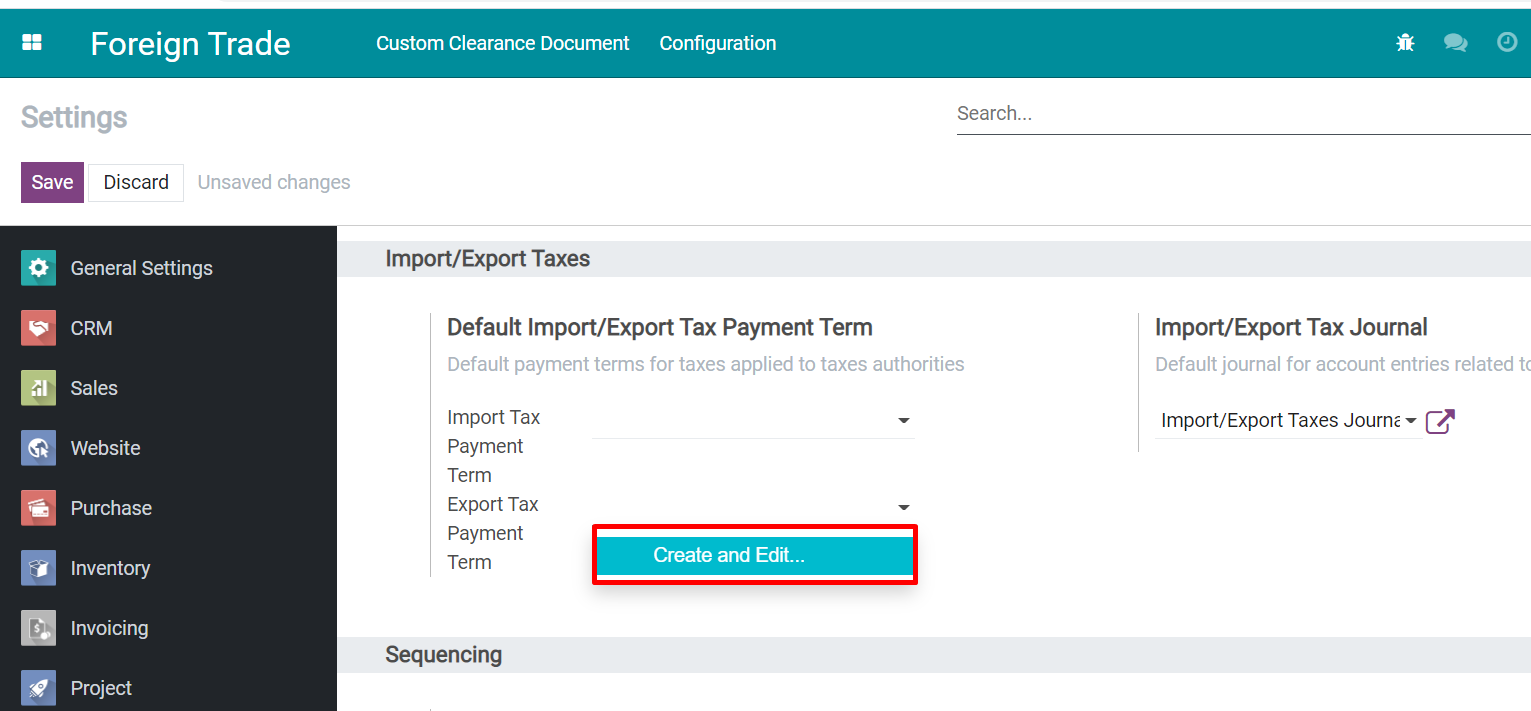
Establish default payment terms for import/export taxes
The default payment term is applied to importing/exporting tax and will be automatically filled when you working on Custom clearance documents.
Import Tax Payment Term
Step 1: Access Module “Foreign Trade” >> Select menu “Configuration” >> “Settings”
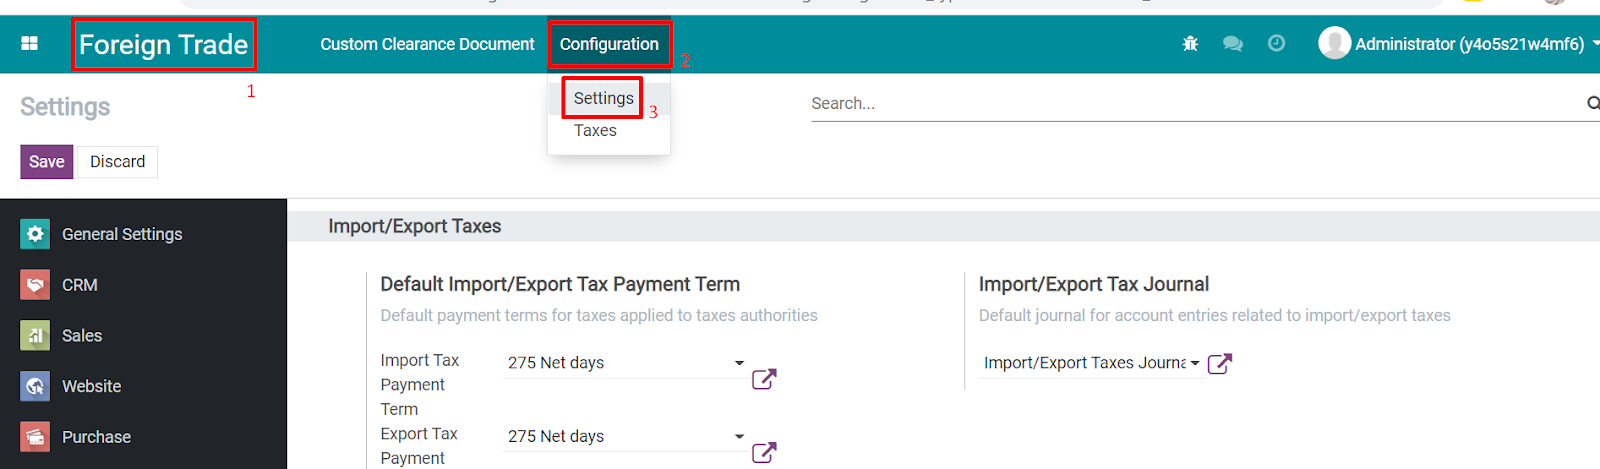
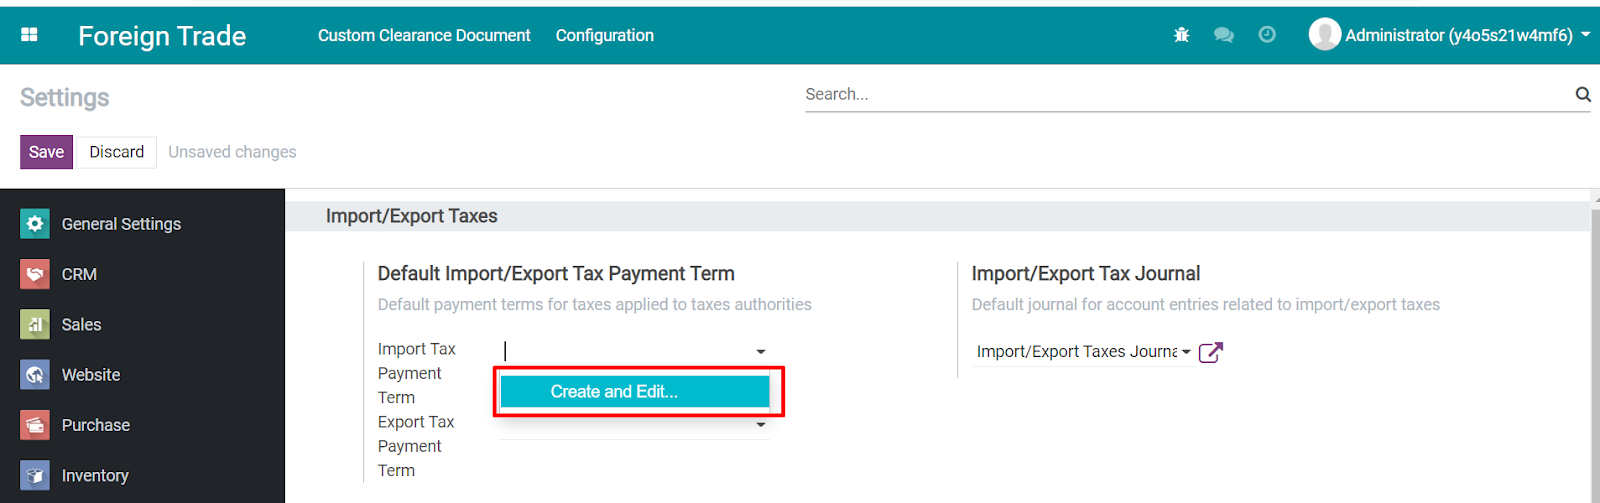
Step 2: In the “import tax payment term” category, select “Create and Edit”
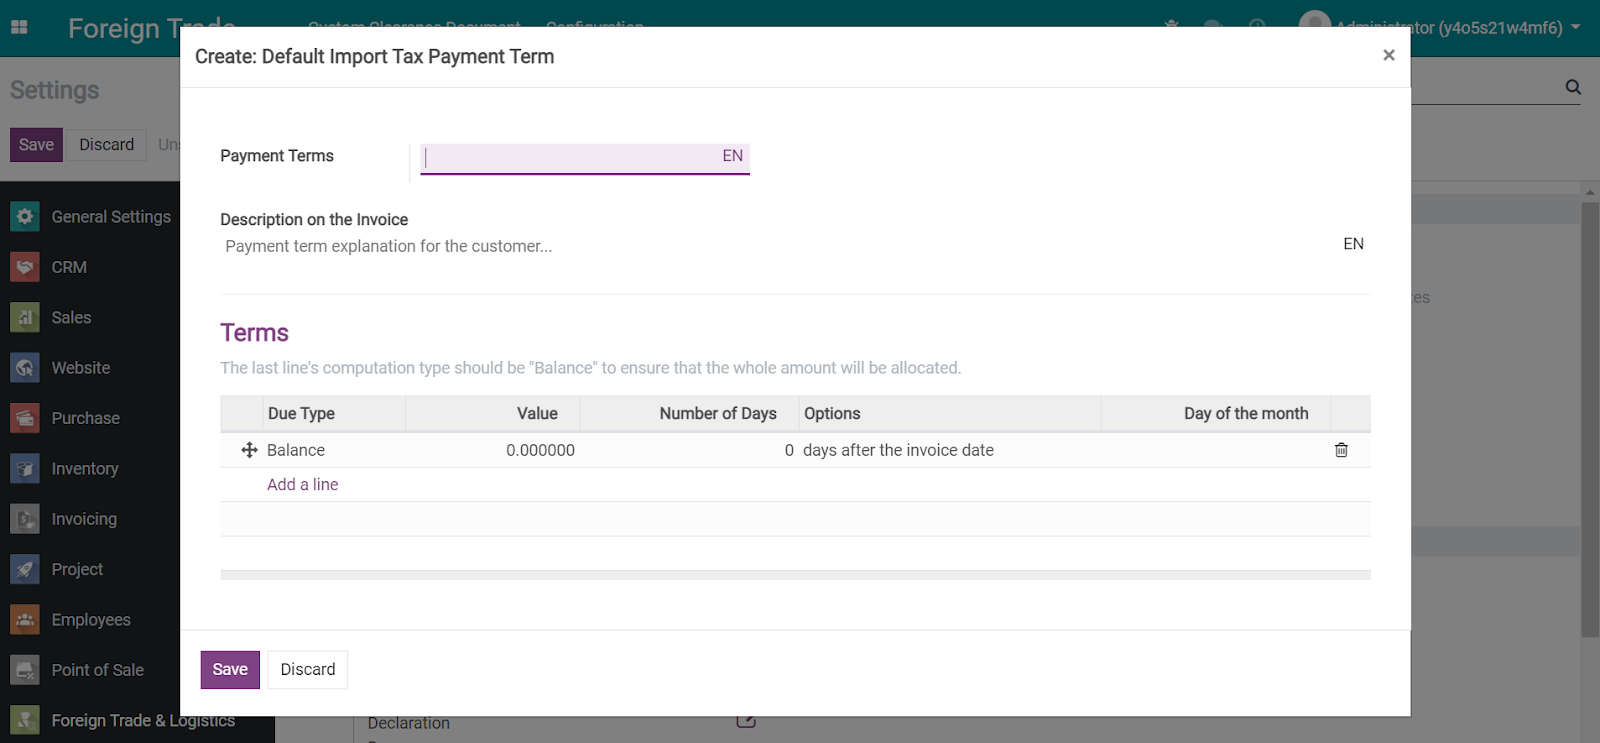
Step 3: Fill the information in the default tax payment term form, including:
Payment terms: name of the payment terms
Description on the invoice: a short explanation of the payment term for the customer, this will be shown on the invoice
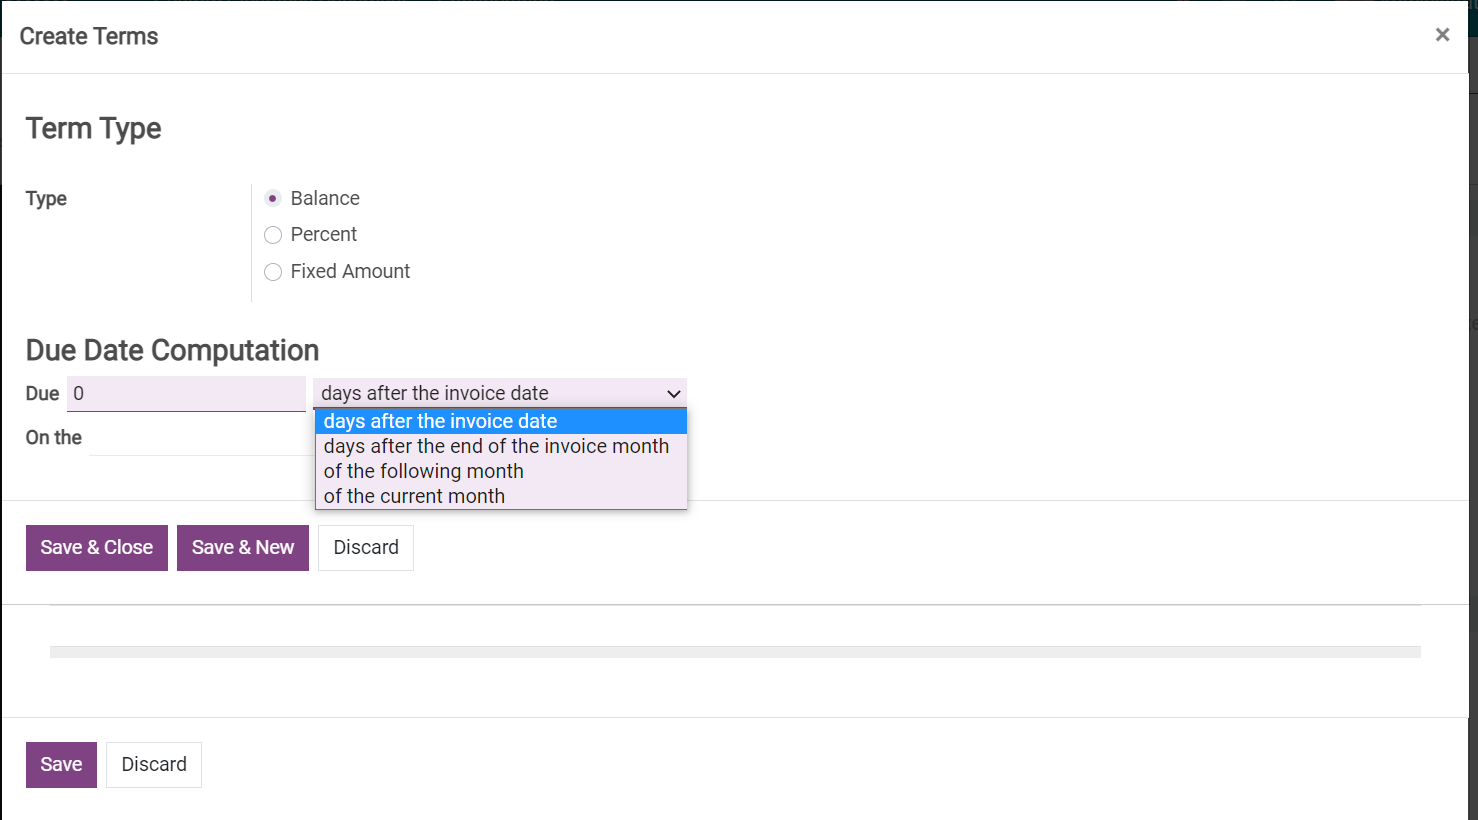
Terms: click "Add a line" to create payment terms with different term types and due date computation modes

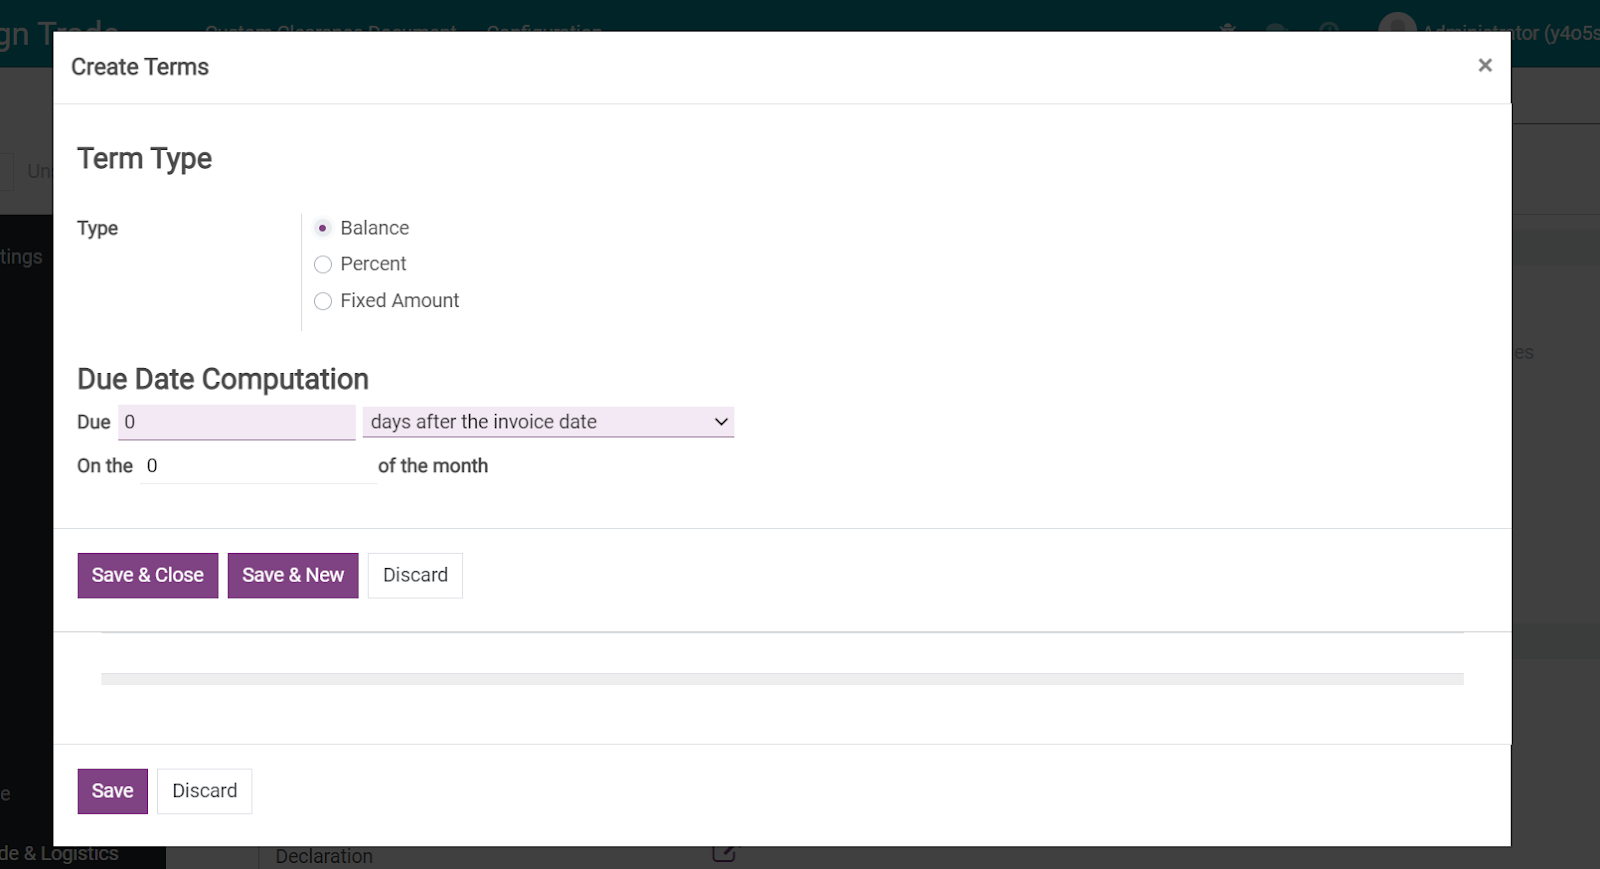
Step 5: Choose the payment period in the term type form. There are 4 options, including:
Due in how many days after the invoice date, on which day of that month
Due in how many days after the end of the invoice month
Due on which day of the month following the invoice month
Due on which day of the current month (invoice month)
Upon completing the term type form, select “Save & Close”. Choose “Save & New” if you want to create another term type, choose “Discard” if you don’t want to save the changes you just made.
2. Export Tax Payment Term
Step 1: Access Module “Foreign Trade” >> Select menu “Configuration” >> “Settings”
Step 2: In the “export tax payment term” category, select “Create and Edit”
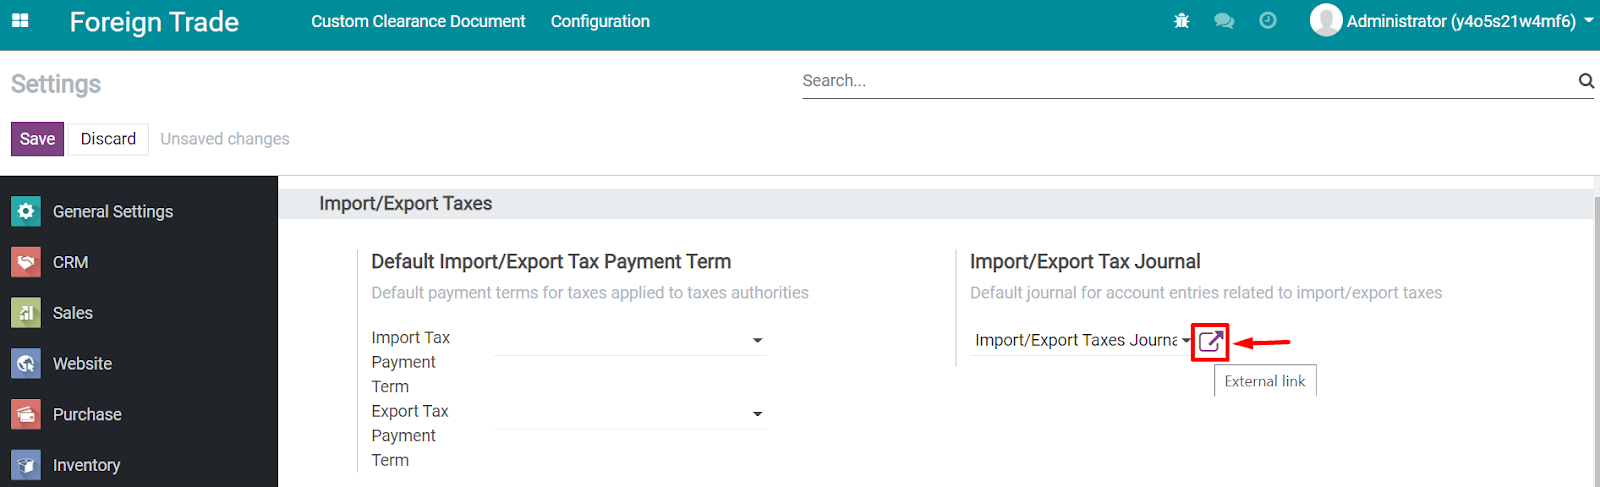
Establish import/export tax journal
This feature allows you to establish a default journal for account entries related to import/export taxes.
Step 1: Access module “Foreign Trade” >> Select menu “Configuration” >> “Settings”
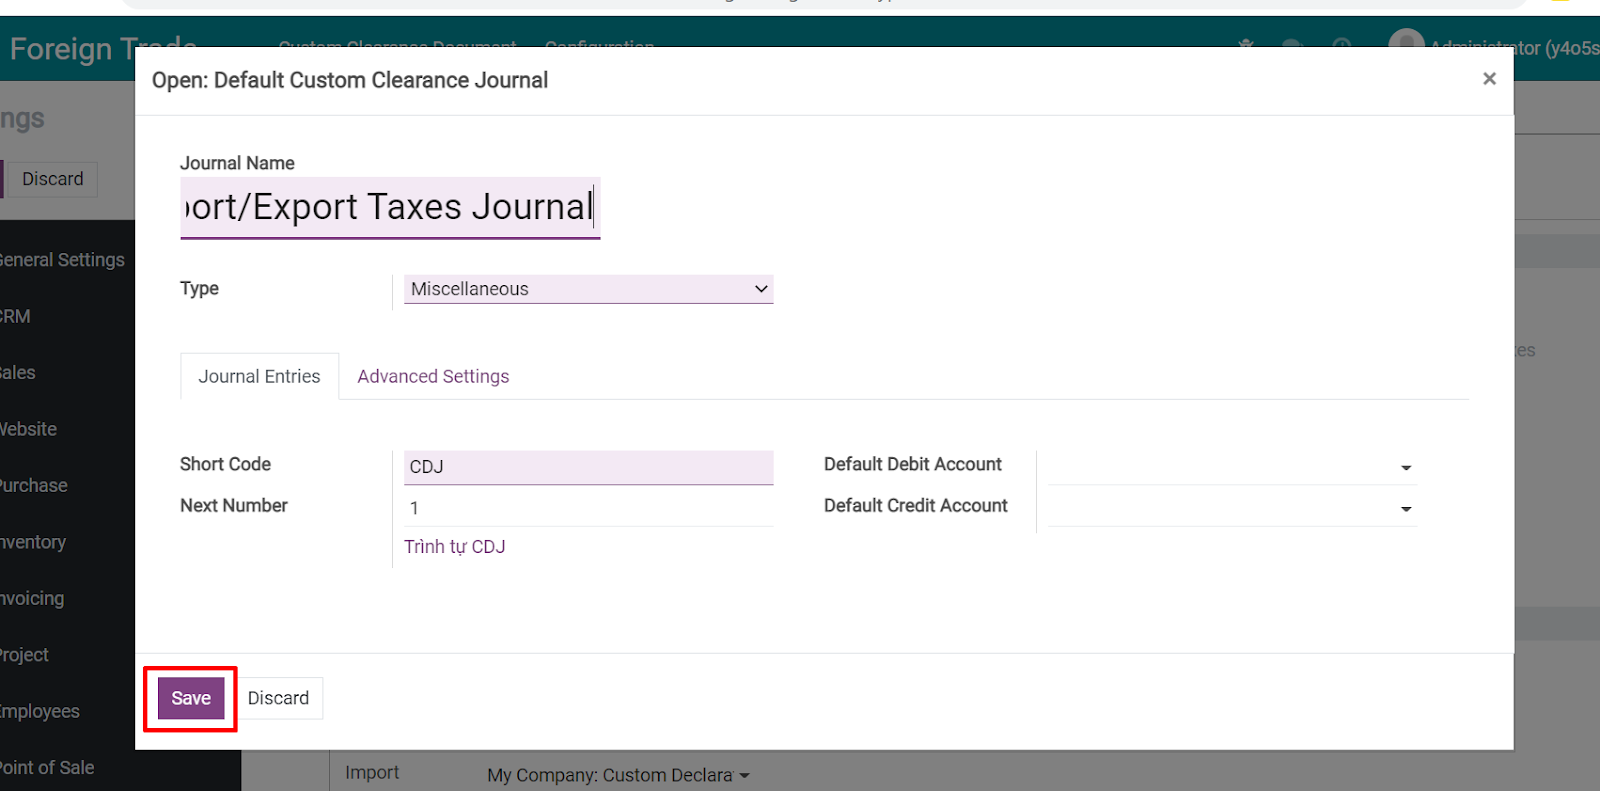
Step 3: Fill in the compulsory fields, denoted in light purple. These fields include:
Journal name: Import/Export taxes journal
Type: default type is Miscellaneous journal
Short code: the journal entries of this journal will be named using this prefix
Also, choose the default debit account and credit account in accordance with the charts of accounts your company uses.
Click “Save” to save all the changes you have made.