Demo video: Website Documentation
What it does
Online document management on the Website.
Key features:
- Create documentation with a hierarchical model: Subject > Section > Category > Document > The content of document;
- Confirm/Approve documents;
- Published/Unpublished documents and categories;
- Edit categories and online documents:
- Sort documents, categories;
- Add tags to document;
- Quick search documents;
- Change image and color cover of categories.
- The merge documents feature: selects the source Document and the target Document to merge, returning the target Document including the articles of both the source Document and the target Document.
Access right:
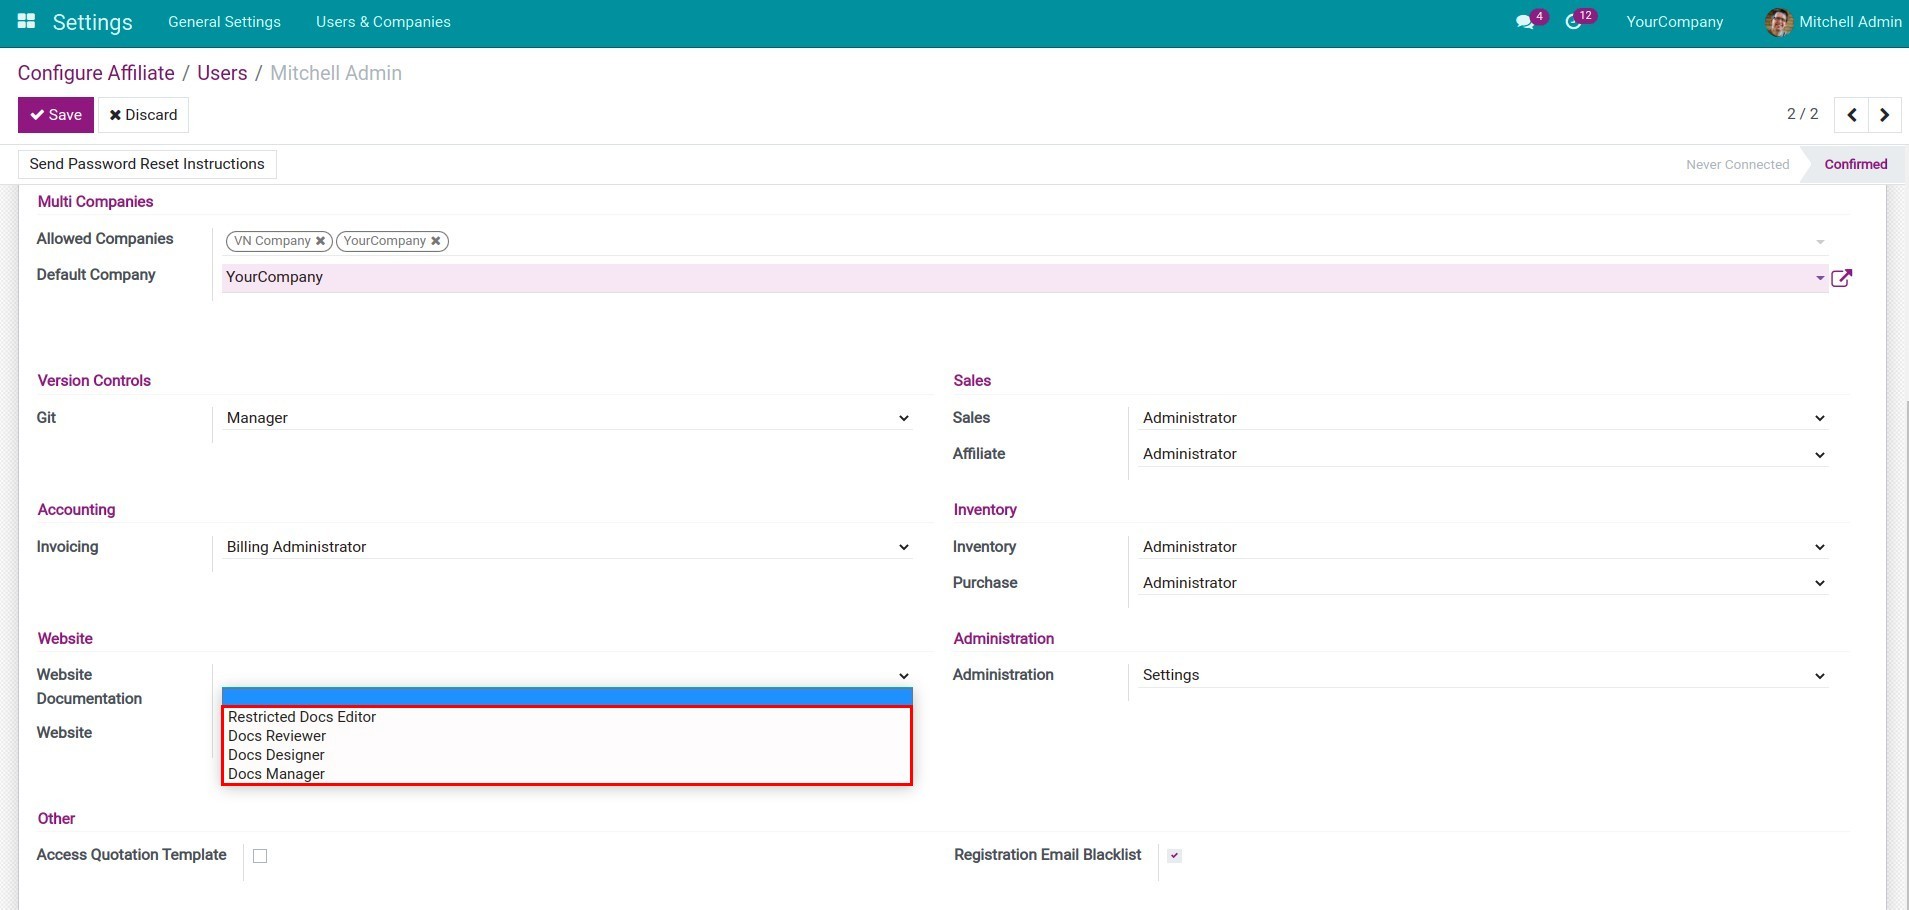
Include 4 Access right: Restriced Docs Editor, Reviewer, Designer, Manager.
- Restriced Docs Editor:
- Create documents/contents.
- Allow Edit of Document/Content if Assigned and its status is Draft/Confirmed/Reject.
- Allow Delete of Document/Content if Assigned, is the author and its status is Draft/Confirmed/Reject.
- Allows Merge of Documents created by yourself.
- Reviewer:
- Includes Restriced Docs Editor's rights;
- Allow create/edit Category (Do not publish / unpublish);
- Change the cover image and background color for the category;
- Edit/Delete Restriced Docs Editor's Document;
- Allows Merge of Documents created by different Restricted Docs Editors.
- Designer:
- Includes Content Moderator rights;
- Allow to publish Documents/Contents/Categories;
- Edit/Delete Reviewer's Document.
- Manager
Editions Supported
- Community Edition
- Enterprise Edition
Installation
- Navigate to Apps.
- Search with keyword to_website_docs.
- Press Install.
Instruction
Instruction video: Website Documentation
Granting access rights to user
First, you need to grant access rights to user appropriate rights to fulfill the job function when using the Website Documentation software.
Create a new documentation
Website Documentation software allows you to create and manage documents in a hierarchical form such as a directory tree structure to easily search for information and support work.
So, to create a documentation, you need to do the following steps:
1. Create a subject.
Subject is the main subject of the documentation you provide and is the highest hierarchy of the document. Navigate to Website > Documentation > Subject > Create to create a new documentation.

2. Create a section.
Section is the sub-hierarchy of the subject. For example, the subject is User Documentation including the section on Experimental Information and Applications.

3. Create a category.
Category is the main content group in the section. Categories will be arranged in the respective Section area on the Website. For example, CRM, HR categories in the Apps section.
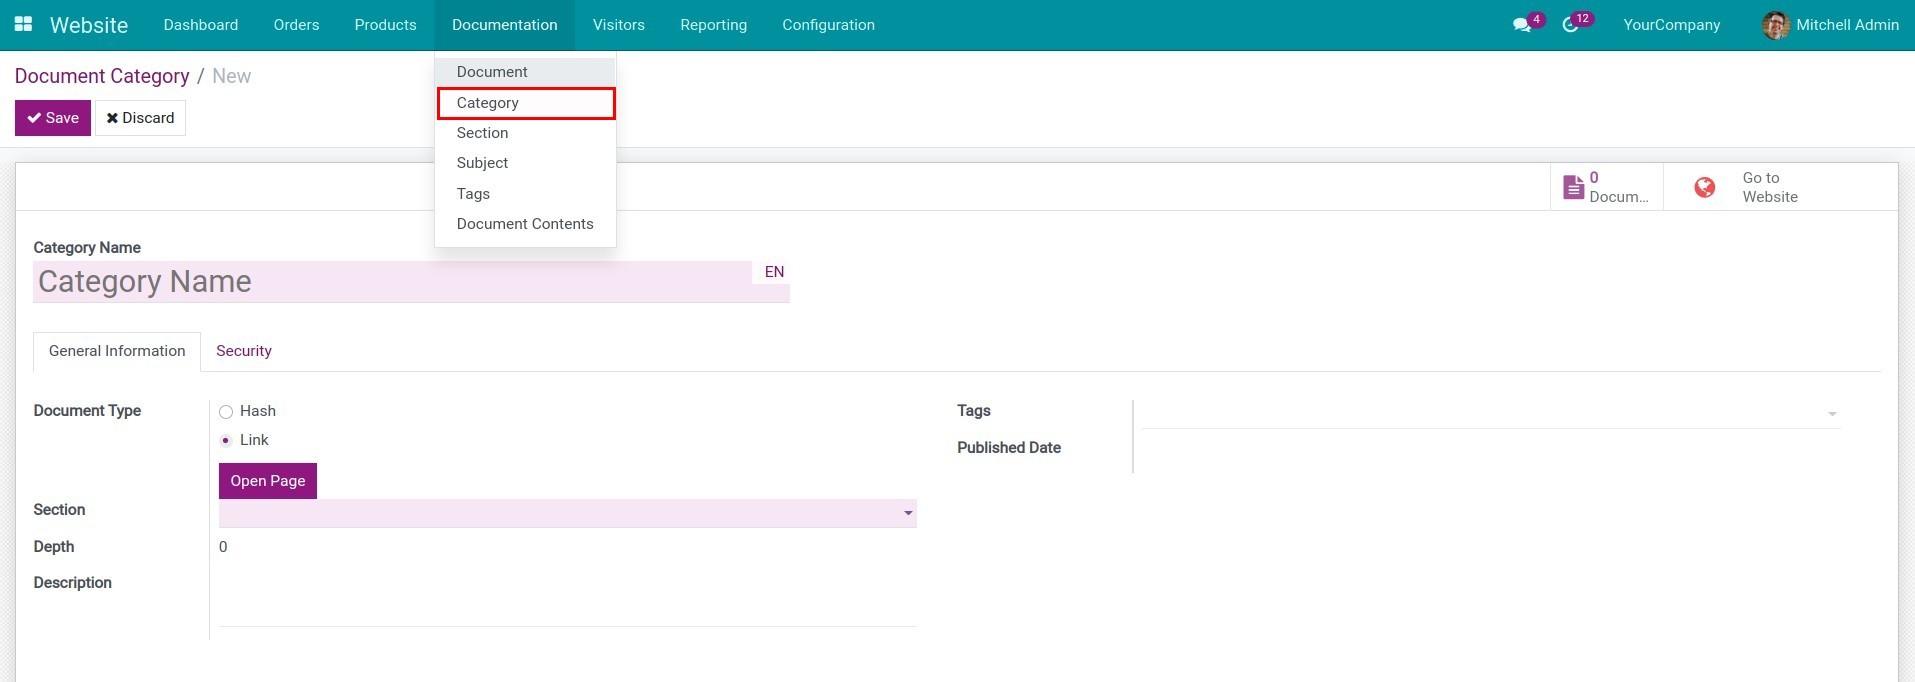
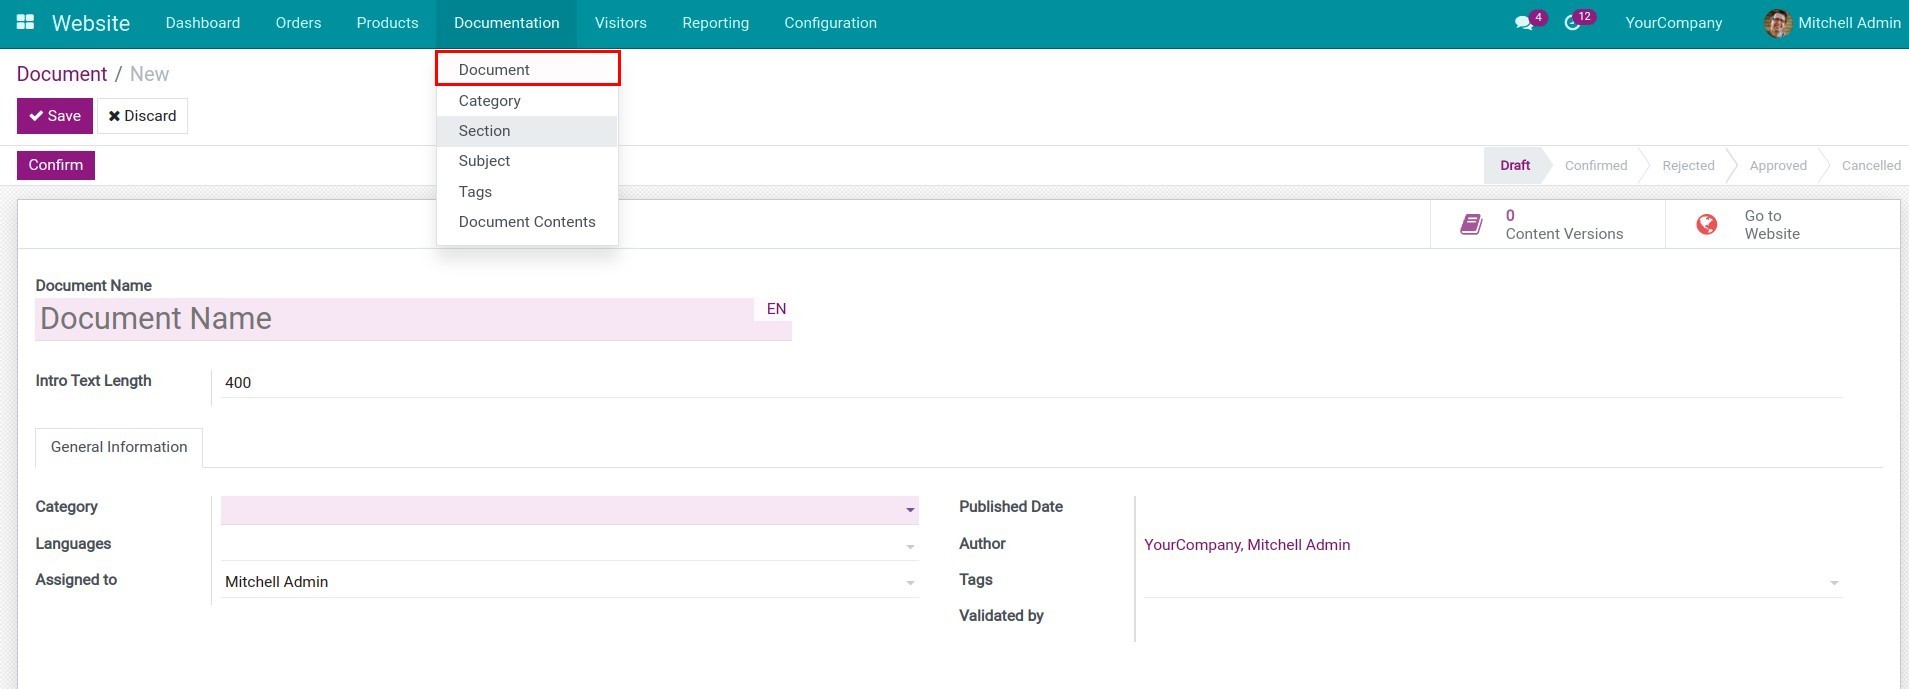
4. Create a document.
You need to create corresponding documentation in categories to contain the content you want to convey by navigating to Website > Documentation > Document > Create.
5. Create the content of the document.
Navigate to Website > Documentation > Document Contents > Create to create the content of the document.

The Website will view the following:

Approve and publish documents
1. Approve documents and the content of documents.
- With documents are created and validated, the person with approval authority will check and approve/reject the document.
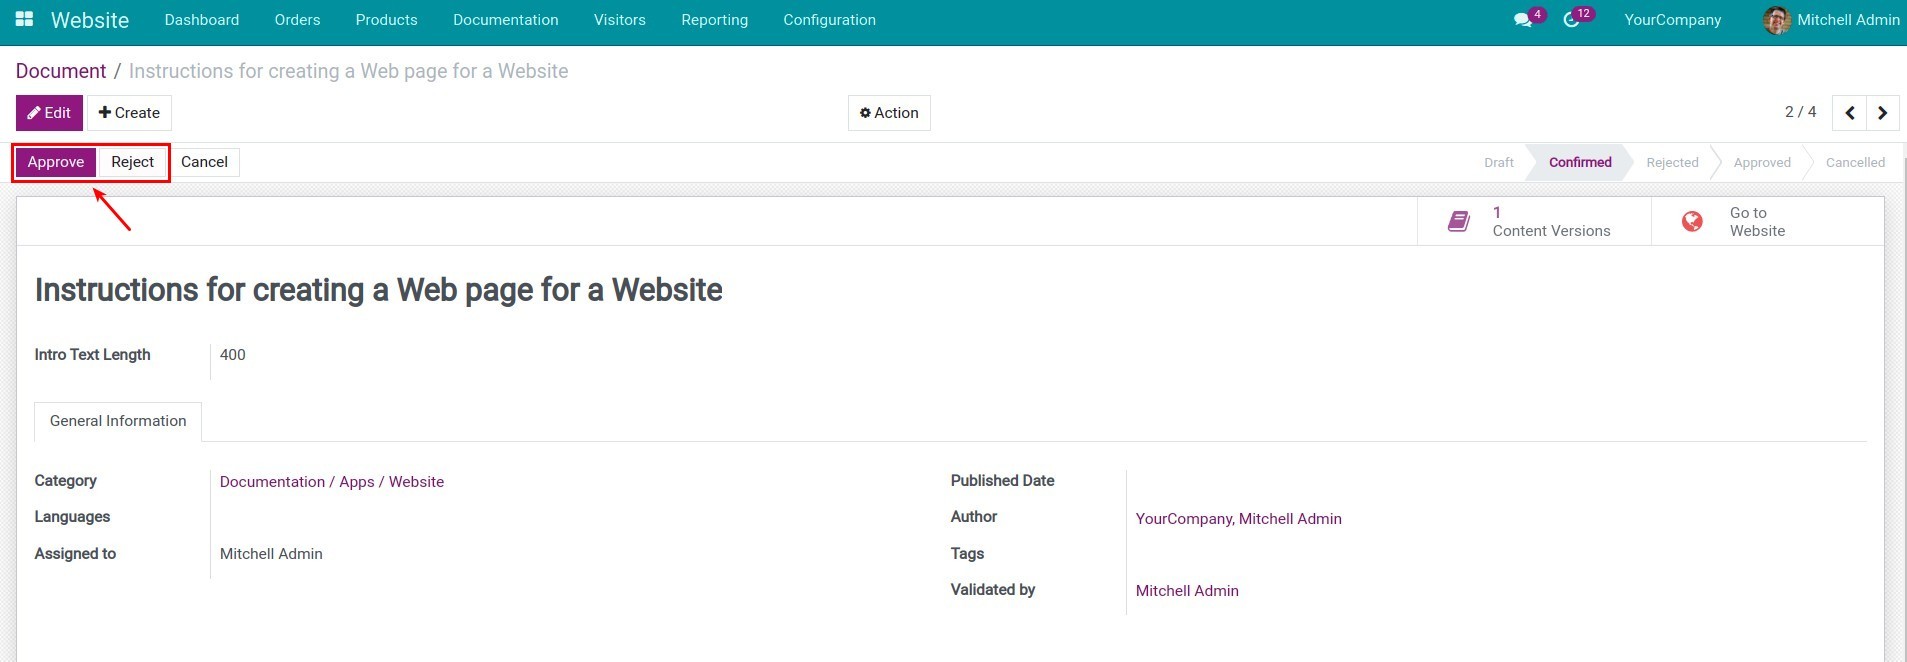
- Then, the approver will approve/reject the contents of that document to determine whether the content is eligible for publishing.

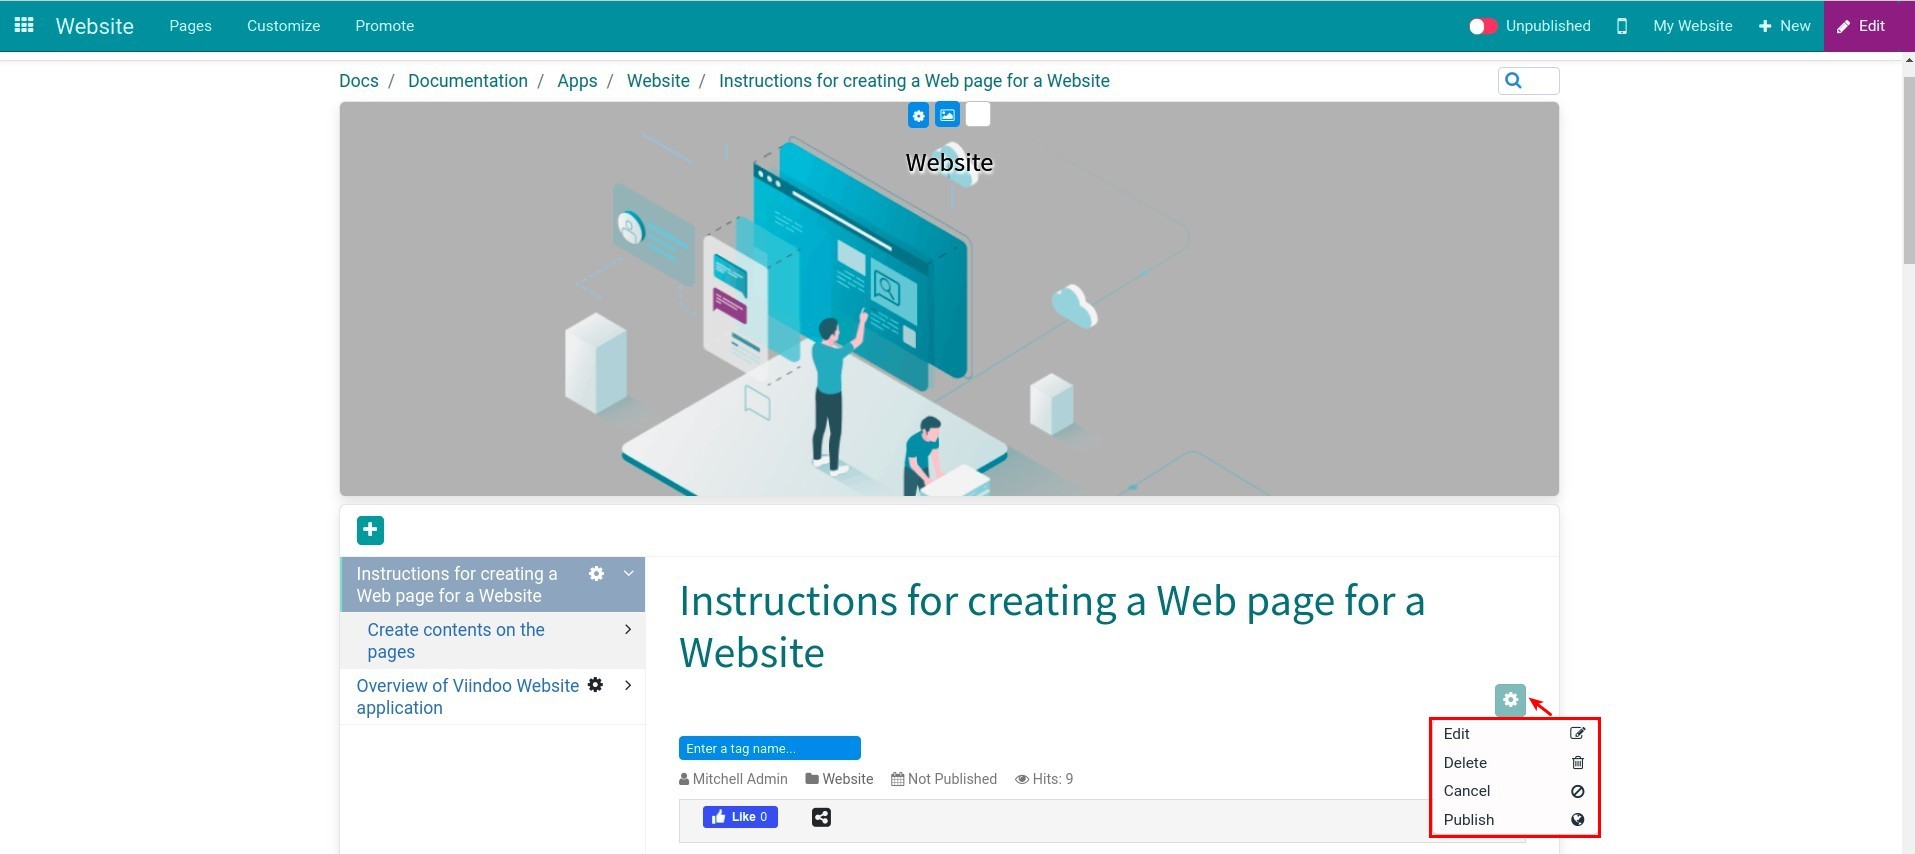
2. Publish documents.
With approved documents and content, you can publish them on the Website.
Manage documents
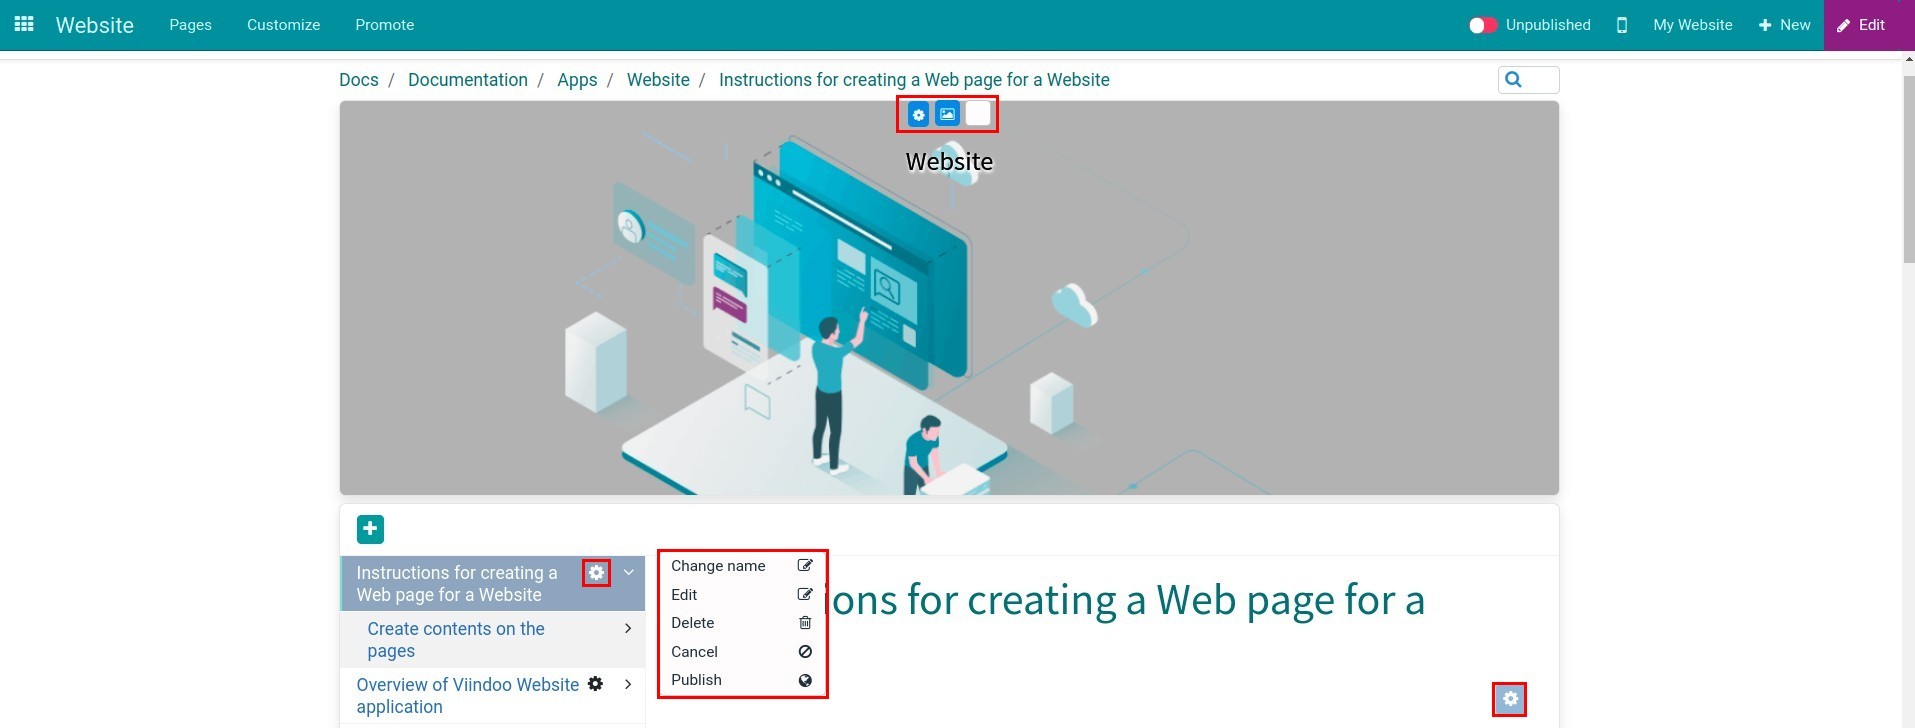
1. Edit Website documents.
On the Website view, you can make adjustments to the modules you have created. For example, with the category, you can edit the name, change the background image, background color, arrange the order,...
2. Merge documents.
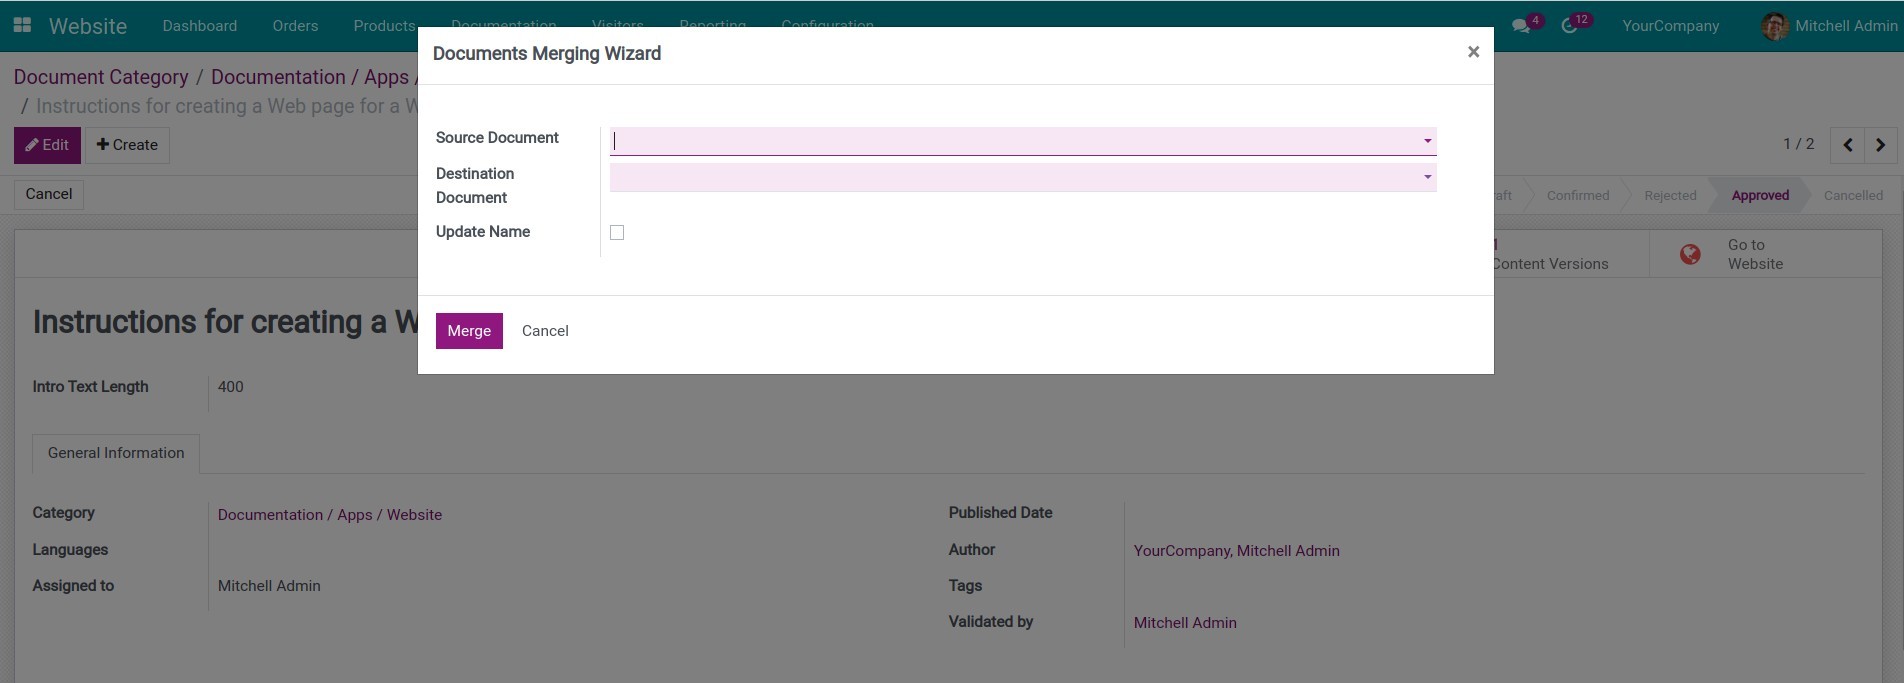
When you want to merge 2 documents into 1 composite document, on the Document view, click Actions > Documents Merging Wizard. After merging, the contents of the source Document are all transferred to the target Document.
This software and associated files (the "Software") may only be
used
(executed, modified, executed after modifications) if you have
purchased a
valid license from the authors, typically via Odoo Apps,
or if you
have
received a written agreement from the authors of the
Software (see the
COPYRIGHT file).
You may develop Odoo modules that use the Software as a library
(typically
by depending on it, importing it and using its
resources), but
without
copying any source code or material from the
Software. You may distribute
those modules under the license of your
choice, provided that this
license
is compatible with the terms of
the Odoo Proprietary License (For
example:
LGPL, MIT, or proprietary
licenses similar to this one).
It is forbidden to publish, distribute, sublicense, or sell
copies of the
Software or modified copies of the Software.
The above copyright notice and this permission notice must be
included in
all copies or substantial portions of the Software.
THE SOFTWARE IS PROVIDED "AS IS", WITHOUT WARRANTY OF ANY KIND,
EXPRESS OR
IMPLIED, INCLUDING BUT NOT LIMITED TO THE WARRANTIES OF
MERCHANTABILITY,
FITNESS FOR A PARTICULAR PURPOSE AND
NONINFRINGEMENT. IN NO EVENT
SHALL THE
AUTHORS OR COPYRIGHT HOLDERS
BE LIABLE FOR ANY CLAIM, DAMAGES OR OTHER
LIABILITY, WHETHER IN AN
ACTION OF CONTRACT, TORT OR OTHERWISE,
ARISING
FROM, OUT OF OR IN
CONNECTION WITH THE SOFTWARE OR THE USE OR OTHER
DEALINGS IN THE
SOFTWARE.
